How to Install Node.js in Windows?
Are you working on a JavaScript project that involves server-side scripting? If so, Node.js is what you need.
Node.js has become a vital tool for developers, allowing server-side scripting and the creation of dynamic web pages.
If you’re a Windows user and need guidance on installing Node.js on your machine, this guide will help you through the installation process.
Table of Contents
Steps on How to Install Node.js on Windows
Step 1/ Check if you have Node.js already installed
Before installing Node.js on your Windows computer, you might want to check if you already have a version of node.js installed previously.
To check if there is Node.js already installed, all you need to do is — open your Command Prompt (CMD) and type in “node -v.”
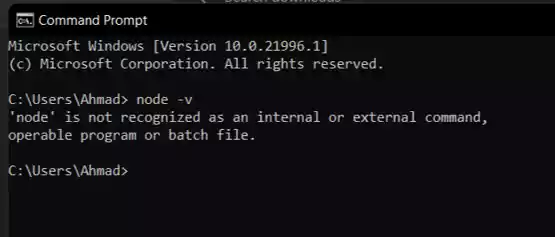
If you see a version number, you’re good to go. If not, proceed to the next steps to install or update Node.js.
Step 2/ Download Node.js
If you do not have Node.js installed, then, navigate to the official Node.js website at https://nodejs.org/en to download the installer.
On the website, you will find multiple versions, but it’s recommended to opt for the one marked as “LTS (Long-Term Support) version — recommended” for optimal performance.
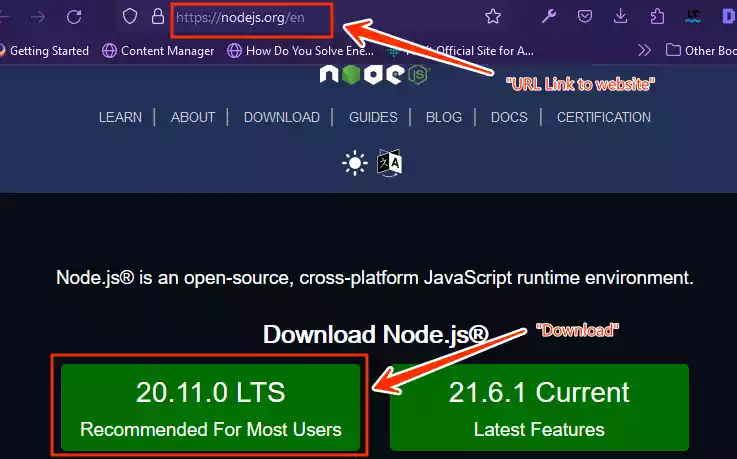
Save and download the installer file to your computer.
Step 3/ Installation of Node.js
After the download is complete, double-click the downloaded installer file (usually named node-vxx.xx.x-x64.msi)to kick-start the installation process.
A welcome page will greet you. The welcome page provides a quick overview.
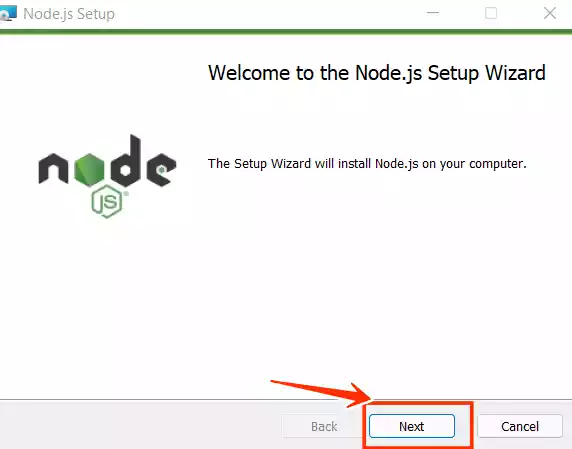
Simply click “Next” to proceed with the default settings.
Step 4/ Accept the license agreement
In the following screen after the above, you will see a screen asking you to accept the license agreement — Click on the tick-box and then “Next” to proceed.
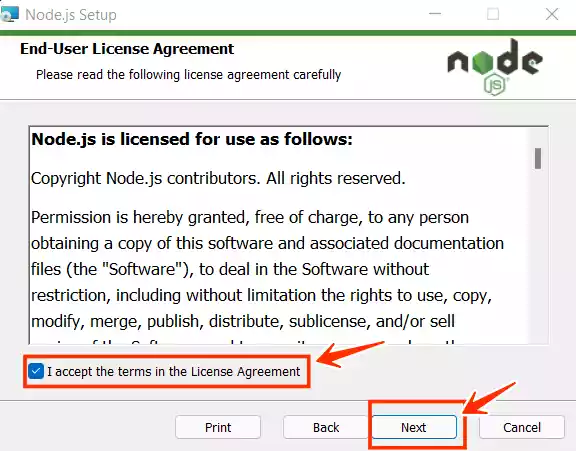
Step 5/ Choose the folder you want to install Node.js
After clicking on “Next”, another screen will be displayed. The installer will display a screen asking for the destination folder for Node.js installation.
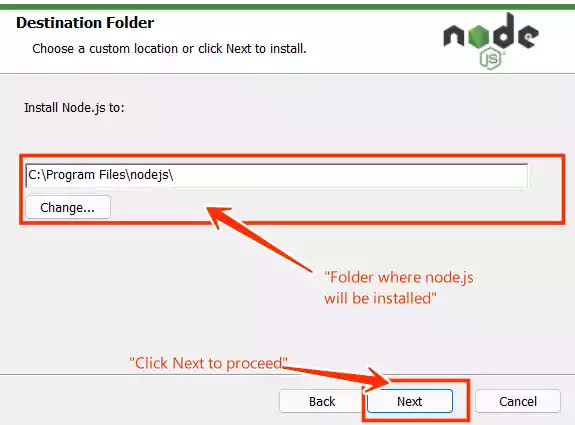
If you prefer a different location, you can customize it. However, it’s advisable to stick with the default program files folder.
Click “Next” to continue.
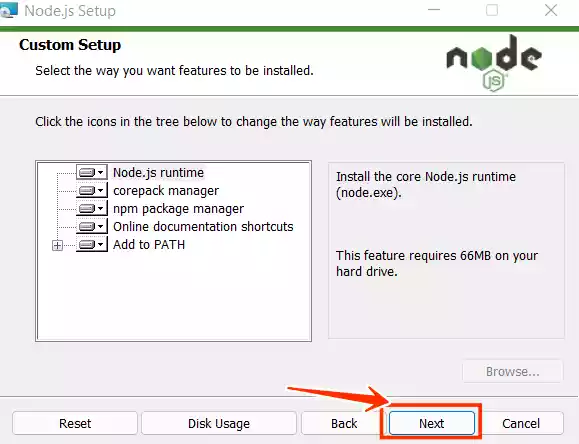
Step 6 / Custom setup screen
On the custom setup screen, leave it as it is and click on “Next”.
Step 7/ “Tools for Native Modules” page
On the “Tools for Native Modules” page, you have the option to select automatic installation of tools required for native modules.
This optional tool is essential for compiling native modules. It ensures compatibility and smooth integration of modules that may have platform-specific code.
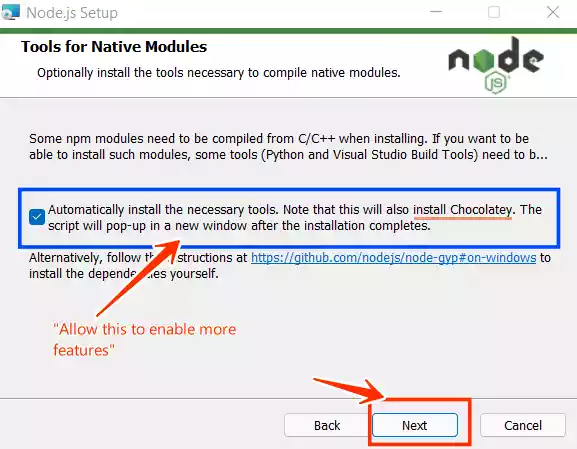
Additionally, Chocolatey, a handy package manager for Windows, will also be installed during the installation process.
This simplifies software installation, configuration, and management from the command line.
Step 8/ ‘Ready to Install Node.js’ page
The Ready to Install Node.js page will provide final instructions. Click on “Install” to initiate the installation process.
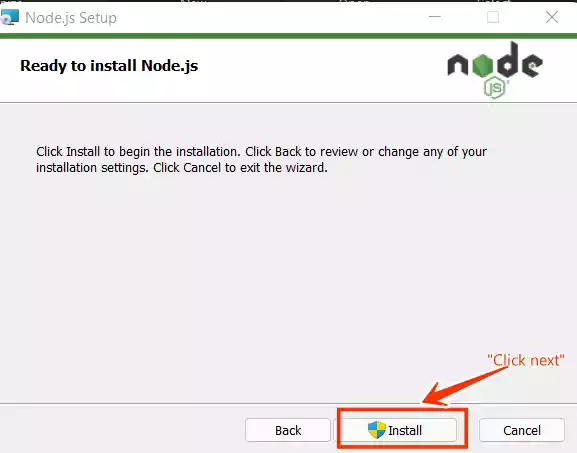
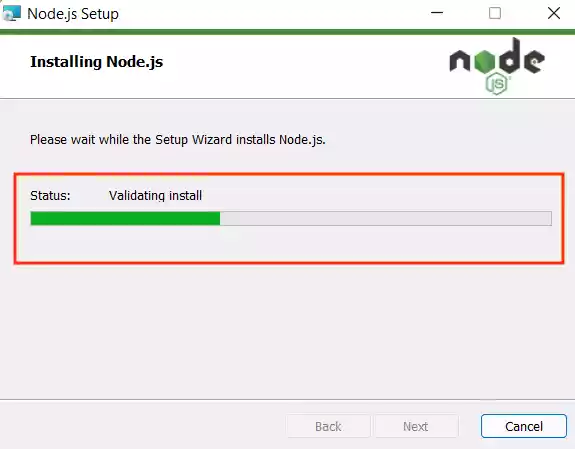
The installation will commence, taking a few seconds to complete. Sit back and let the wizard do its job.
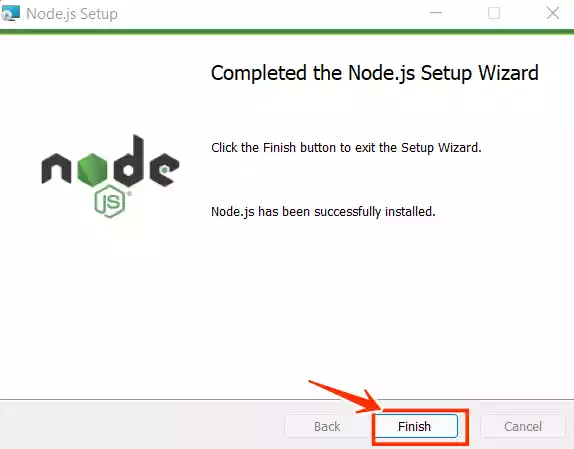
Once the installation is complete, a success page will appear. Click on “Finish” to finalize the Node.js installation on your Windows system.
Verification in Command Prompt
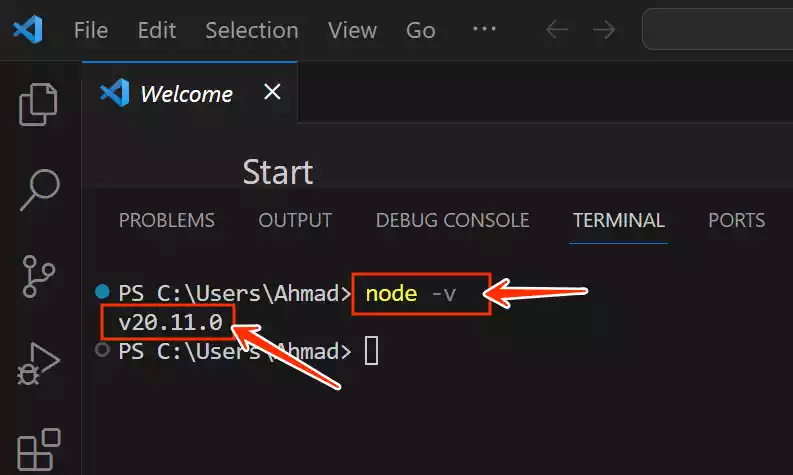
Return to the Command Prompt and enter “node -v” to confirm the successful installation.
If the version is displayed, congratulations, you’re now ready to leverage Node.js.
Troubleshooting
In case you encounter any errors during the installation, refer to this post for troubleshooting steps to resolve issues promptly.
FAQs
1. Can I install Node.js on any Windows version?
Yes, Node.js is compatible with various Windows versions, ensuring widespread usability.
2. What if the installation process is interrupted?
If the installation is interrupted, restart the process from the beginning to ensure a complete and successful installation.
3. Do I need to uninstall the previous version before updating?
No, but it’s advisable to uninstall the previous version before updating to avoid any potential conflicts.
4. Can I change the installation folder later?
While it’s possible, it’s recommended to choose the right folder during the installation process to avoid complications.
5. Is Chocolatey necessary for Node.js installation?
Chocolatey is optional, but it streamlines the process, making software deployment more efficient and automated for Windows users.


