How to setup C/C++ in Visual Studio Code?
Are you trying to learn C or C++ programming using Visual Studio Code, or are you experiencing issues during the installation process?
In this guide, we will walk you through the step-by-step process of installing the “MinGW” compiler and running C and C++ programs in Visual Studio Code.
Table of Contents
Steps on how to set up C/C++ in Visual Studio Code:
1/ Download MinGW
The first step in setting up your C/C++ development environment is to download the MinGW (Minimalist GNU for Windows) compiler.
MinGW is a collection of free and open-source compilers for C and C++ languages.
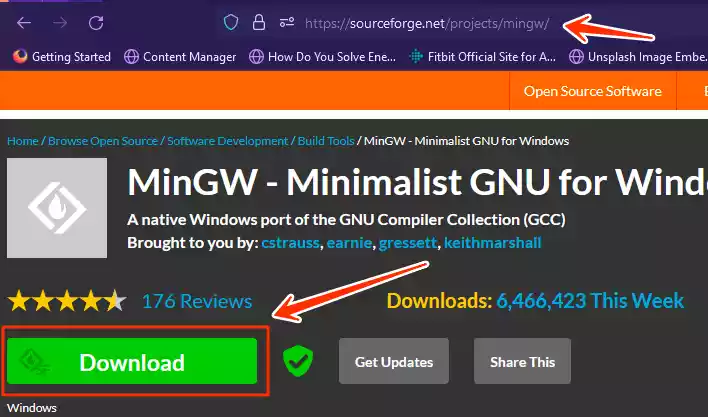
- Go to the MinGW download page at https://sourceforge.net/projects/mingw/.
- Download the MinGW installation executable.
2/ Install MinGW
After downloading the MinGW installer, follow these steps to install it:
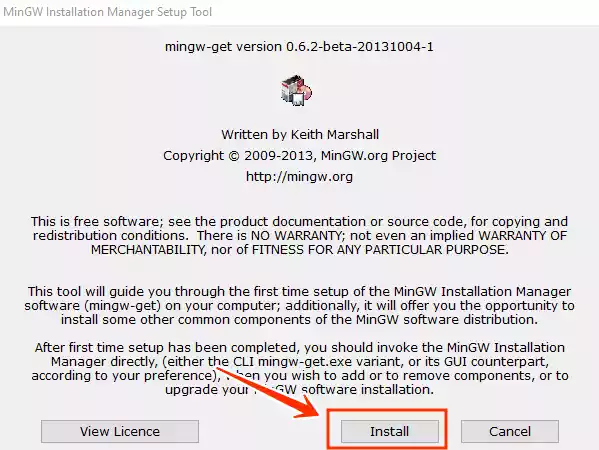
- Run the MinGW installer executable.
- The setup screen will appear. Click on the “Install” button.
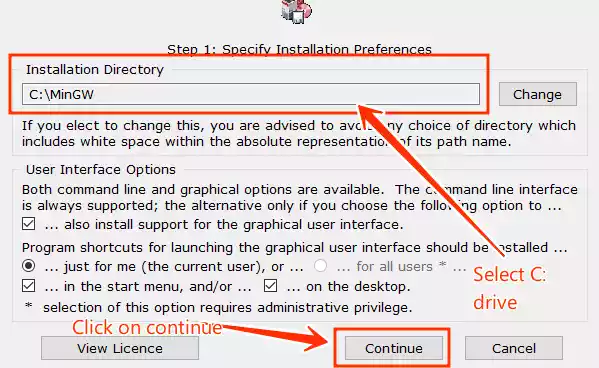
- On the next setup screen, select the path (e.g., C:\MinGW) where you want to install MinGW, and then click “Continue.”
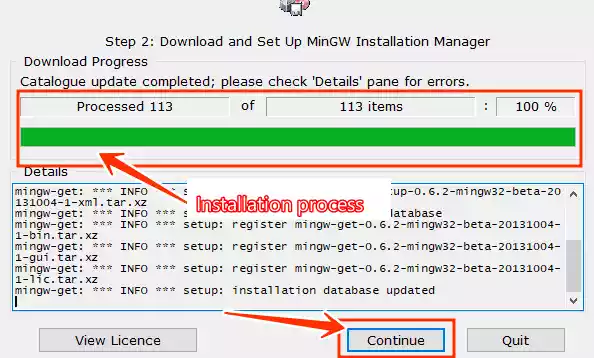
- The installation process will begin. Wait for it to complete, and then click “Continue.”
3/ Configure MinGW Installation
Now that MinGW is installed, let’s configure it for C/C++ development:
-
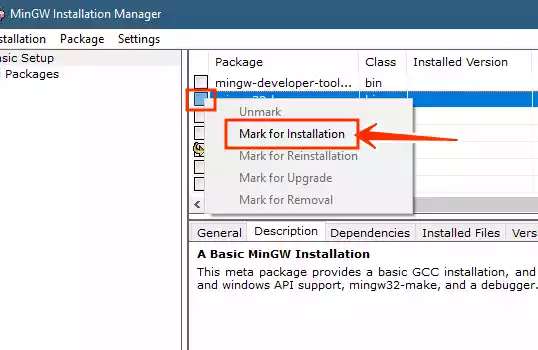
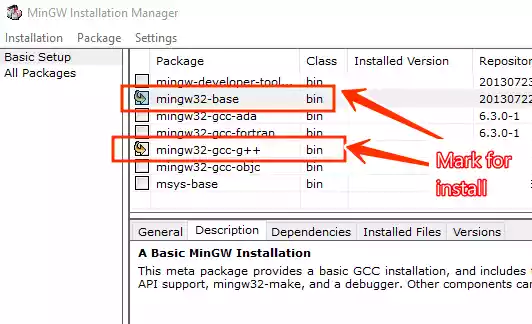
The MinGW Installation Manager will appear. Mark the checkboxes for “mingw32-base” and “mingw32-gcc-g++” for installation.
-
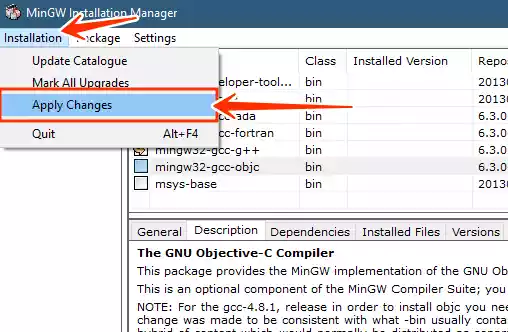
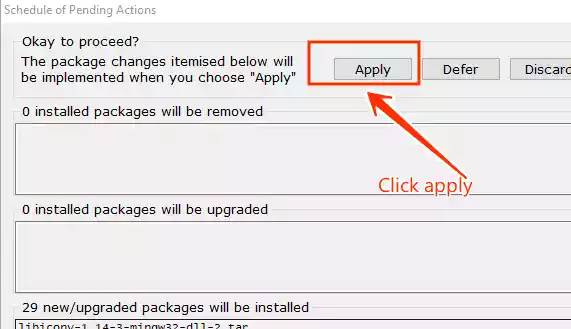
Click on the “Install” option in the menu and then select “Apply Changes.”
-
The installation process for the selected compilers will begin.
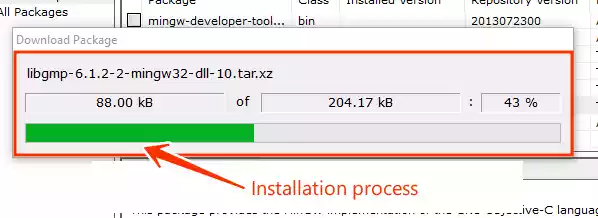
4/ Complete the Installation
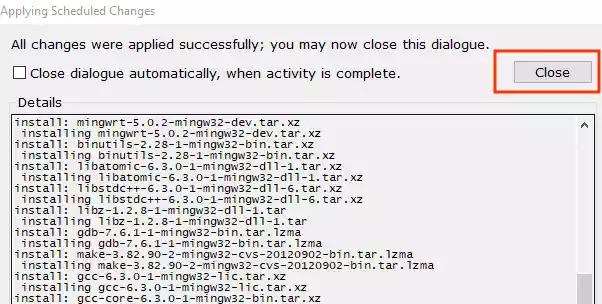
After the installation of the selected packages is finished, follow these steps:
-
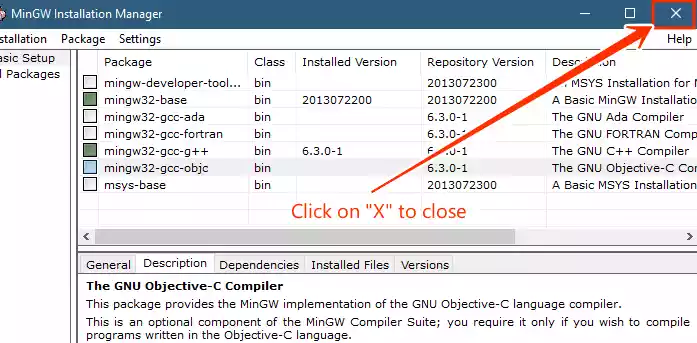
Click “Close” to exit the MinGW Installation Manager.
-
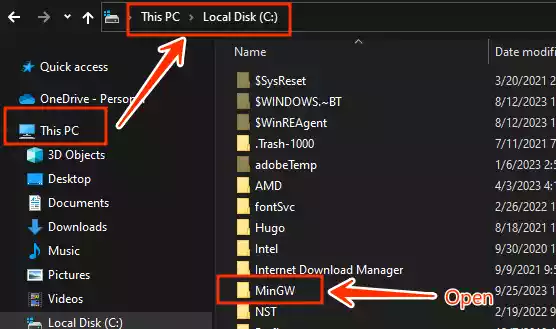
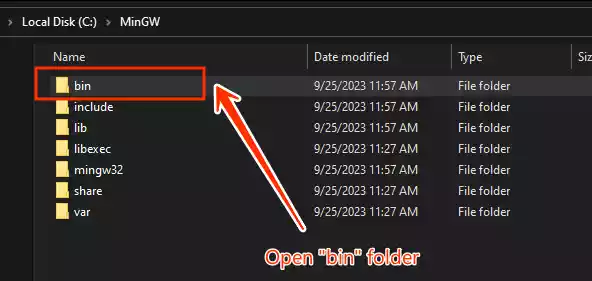
Open the folder where MinGW is installed and locate the “bin” folder.
-
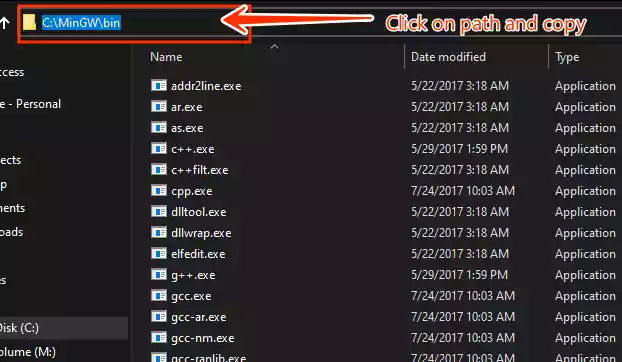
Copy the file path for the “bin” folder.
5/ Configure Environment Variables
To ensure that Visual Studio Code can access MinGW, you need to add the MinGW “bin” folder path to your system’s PATH environment variable:
-
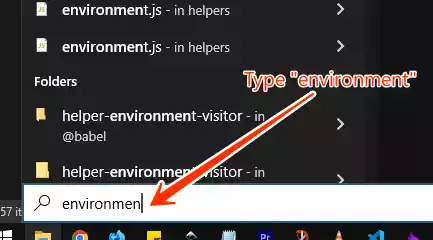
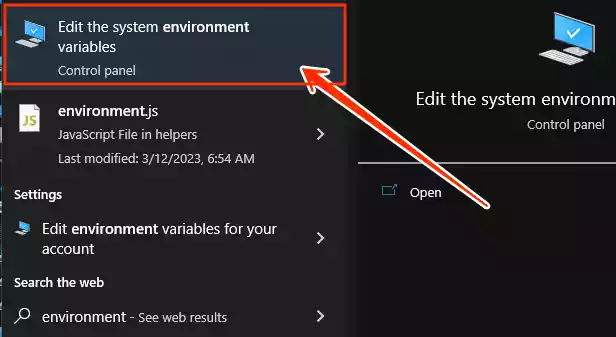
In the Windows search bar, type “environment” and then click on “Edit the system environment variables.”
-
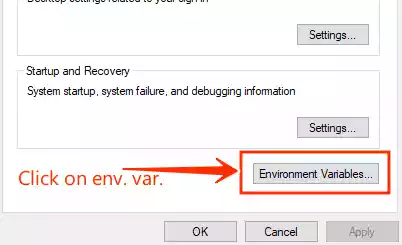
In the System Properties window, click on the “Environment Variables” button.
-
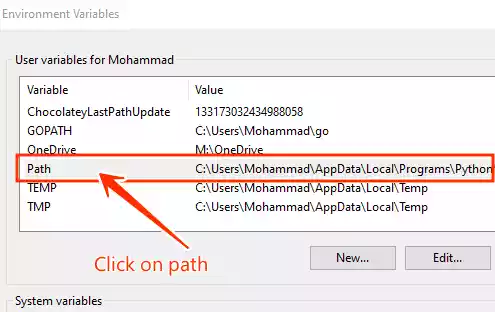
In the Environment Variables window, locate the “Path” section, and click “Edit.”
-
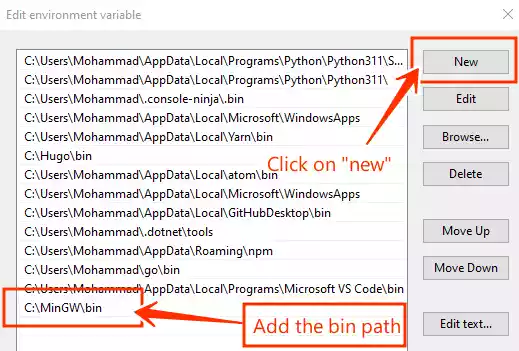
Click on “New” to add a new entry, and paste the file path for the “bin” folder you copied earlier.
-
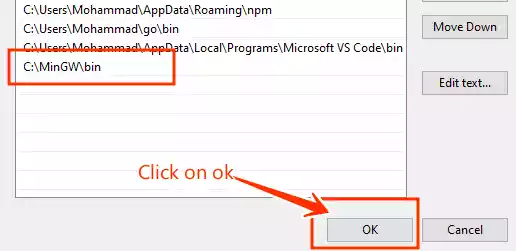
Click “OK” to save the changes.
6/ Verify MinGW Installation
To verify that MinGW is correctly installed and configured, follow these steps:
-
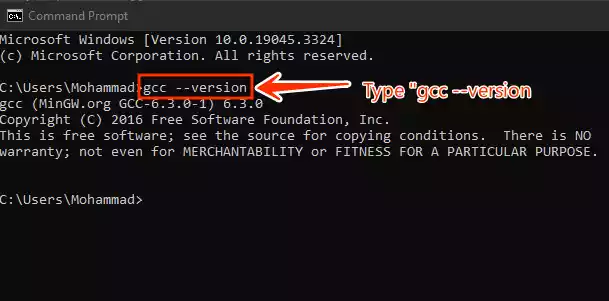
Open PowerShell or Command Prompt.
-
Type the following command and press Enter:
gcc --versionThis command will display the installed GCC version.
7/ Create a C/C++ File in Visual Studio Code
Now that you have set up MinGW and configured your environment, it’s time to create your first C/C++ program in Visual Studio Code:
-
Open Visual Studio Code.
-
Create a new “C” file and add a simple “Hello, World!” code.
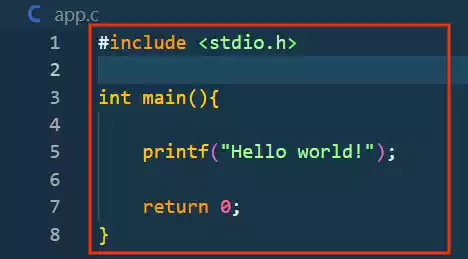
#include <stdio.h>

int main(){

    printf("Hello world!");

    return 0;
}
8/ Install the Code Runner Extension
For an even smoother coding experience, consider installing the “Code Runner” extension in Visual Studio Code:
-
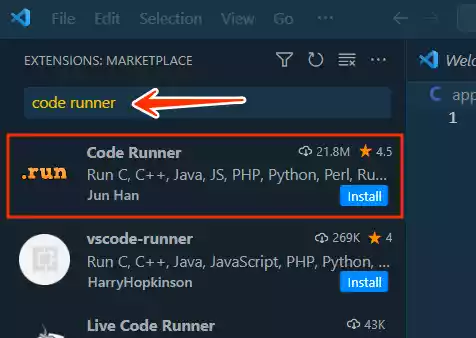
Go to the Visual Studio Code extensions marketplace.
-
Search for “Code Runner” and click “Install.”
-
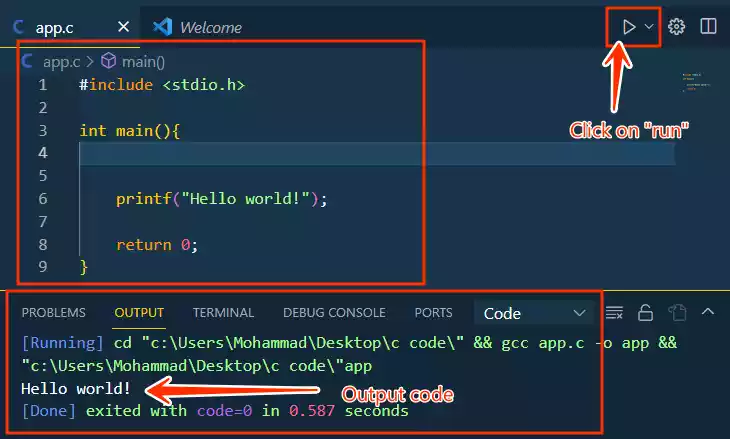
After successful installation, open your C file and click on the “Run” button above it.

Troubleshooting ⚠️
If you encounter any issues while running your code and the output is not as expected, try restarting VSCode.
Also, if the code runs but is not showing any output, you can use the terminal within Visual Studio Code:
-
In the terminal, type the following command, replacing
<file-name-with-extension>and<file-name-without-extension>with your file names:gcc <file-name-with-extension> -o <file-name-without-extension> -
Click enter then, type this and then click enter again:
./<file-name-without-extension>
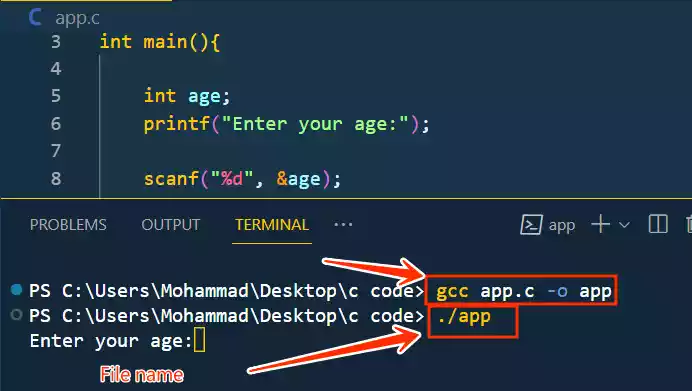
Here’s an example:
gcc app.c -o app
./app
“app.c” is the filename with .c extension.
